
Guide / Materials
Volumes and points
Measured media such as water and haze, wet foam, and points as discs or volume.
Reblend renders Blender's volumes as Cycles does, and adds real media measured at every wavelength, a wet look for foam and spray, and new ways to render point clouds, such as particle and fluid caches from Houdini.
Real media
The Principled Volume node gets a Medium setting. It is in the shader editor's sidebar, Node tab, for the selected Principled Volume, and under the node in Material Properties > Volume.
- None
- The default: Cycles' volume as you set it.
- Water
- Absorbs as pure water does: blue-green that deepens with depth.
- Rayleigh
- Scatters as air and fine particles do: blue haze, and warm light through it.
- Haze
- Mist, smoke and aerosols.
- Water Droplets
- Rain, spray and coarse mist, with rainbows opposite the sun (with Path Tracing and Photon Caustics).
- Ice Crystals
- Thin cirrus, ice fog and diamond dust, with halos around the sun and bright lights.
Reblend Surface's Interior Medium has the same media for the inside of glass and liquids; see Reblend Surface.
Wet foam and spray
Principled Volume's Wet (0 to 1), in the same places as Medium, gives a glossy, wet look where the density changes: foam, whitewater, spray. The volume's density, color and overall brightness stay the same. Wet Roughness, 0.2 by default, runs from sharp highlights at 0 to no gloss at 1.
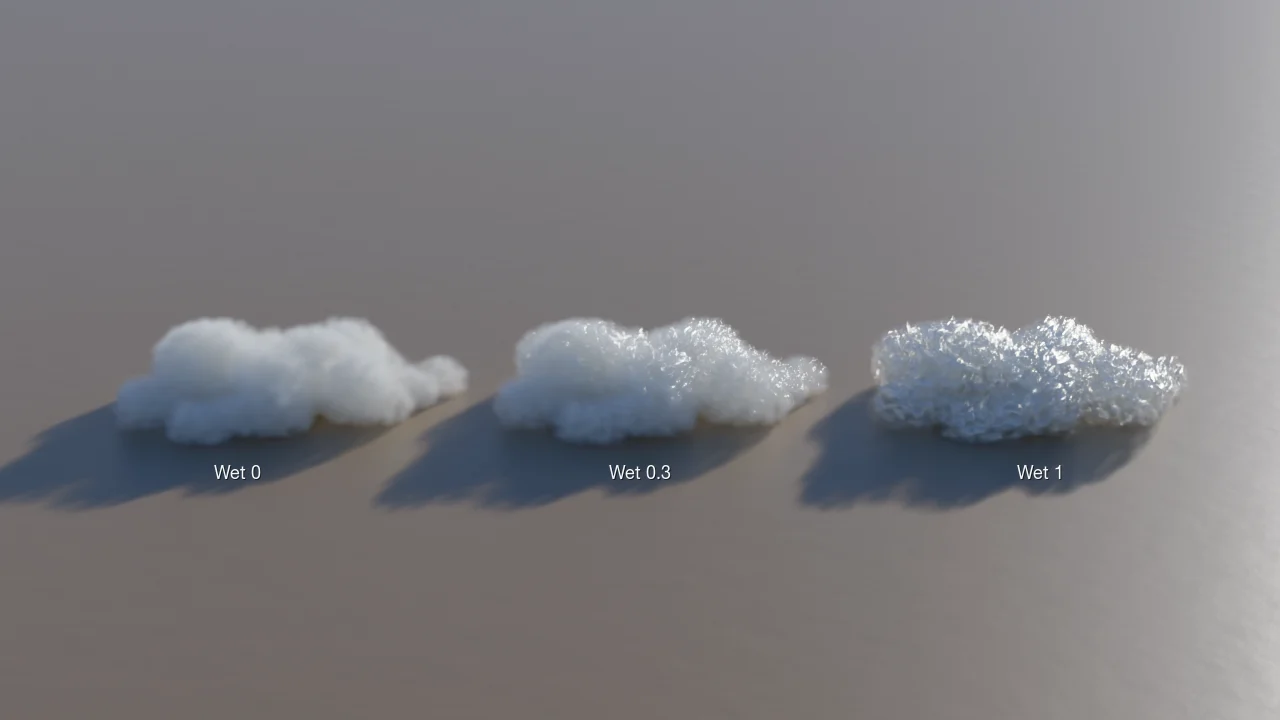
In fine spray every drop is all edge, so Wet 1 turns almost all the light into glints and the body goes dark. About 0.3 keeps a white body with glints.
For more control, the shader editor has two nodes. Add > Input > Volume Gradient gives Gradient, Normal (pointing out of the dense parts), Edge (0 inside even fog, 1 at a sharp surface) and Density. Use it for masks, or for color at the foam's edges. Add > Shader > Wet Flakes is the flakes as a volume shader of their own (Color, Density, Roughness, Normal), for mixing by hand. Pick the grid either node reads in the sidebar (density by default).
Wet works in Path Tracing, Bidirectional and VCM, but not with Open Shading Language turned on. Files still open and render in Blender's Cycles, just without the wet look and the gradient.
Point shapes
Select a point cloud (or any object whose geometry nodes make points). Object Properties > Points > Shape sets how its points render. Point size comes from radius, or from Houdini's pscale.
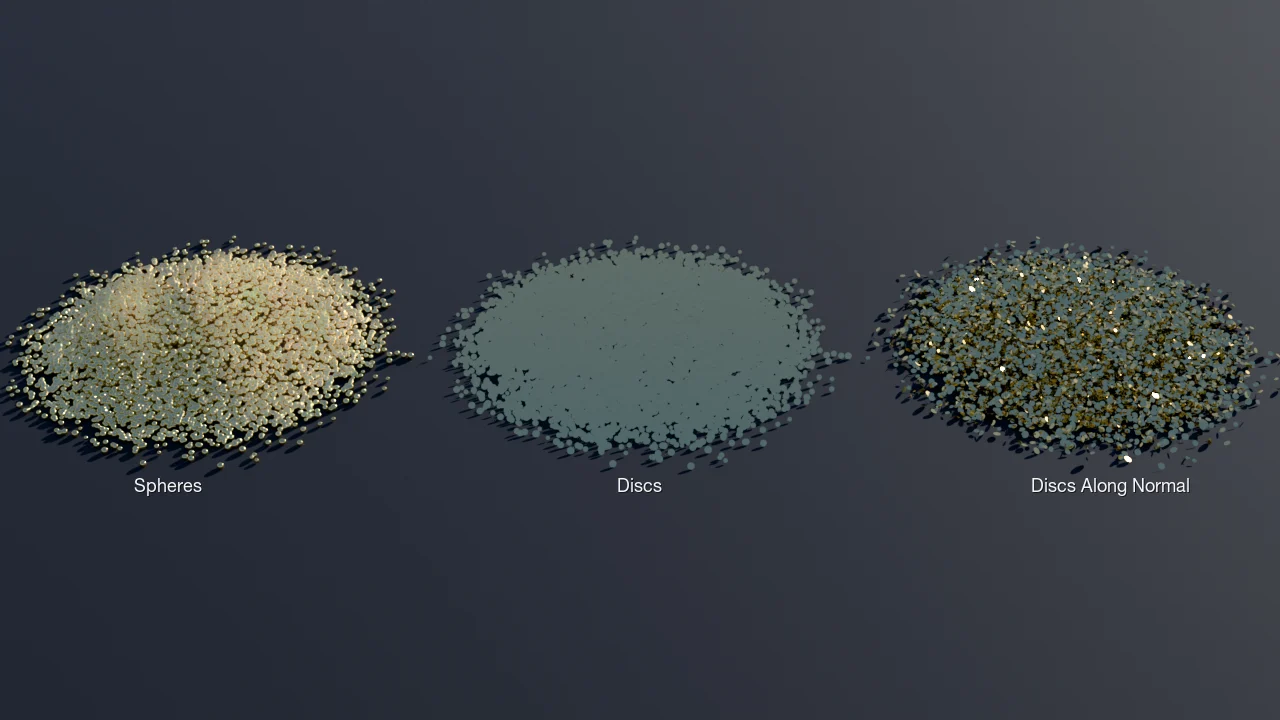
- Spheres
- The default: each point a sphere of its radius, as in Cycles.
- Discs
- Each point a flat disc turned toward the camera. Shadows, reflections and bounced light see the same discs. The point's material shades the discs as it would any surface.
- Discs Along Normal
- Each disc lies across the point's normal attribute, set in Normal. Left empty, it reads N (Houdini's name), then normal. Points without one face the camera.
- Volume
- Each point a soft ball of density. Together they make a volume, which the object's Principled Volume shades as it would a VDB, with no volume file to write. Density names the point attribute that scales each ball; left empty, it reads density when the points have it, else 1. Other attributes (Cd, temperature, your own) blend smoothly between the points; read them with an Attribute node. Motion blur works with a velocity attribute or with object animation.
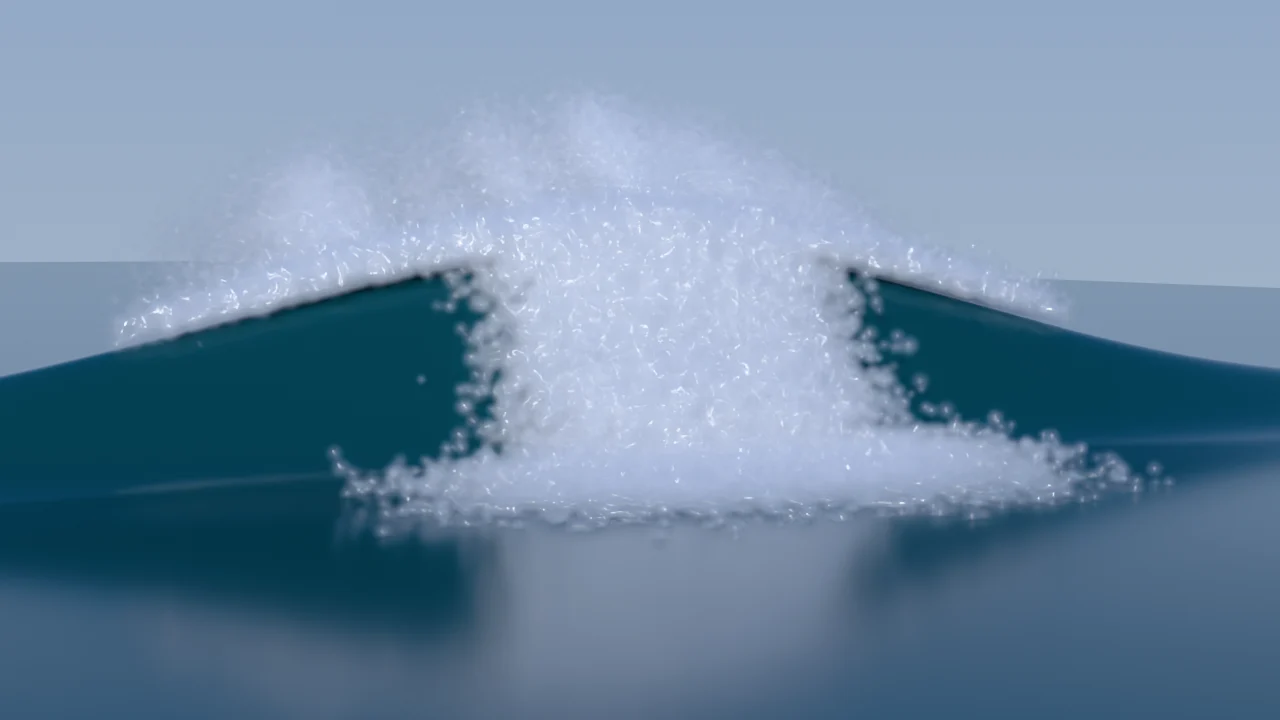
Houdini caches through USD work too: pscale or widths, Cd and N are picked up.